Data import
To get started with a new data set, navigate to the data-import page.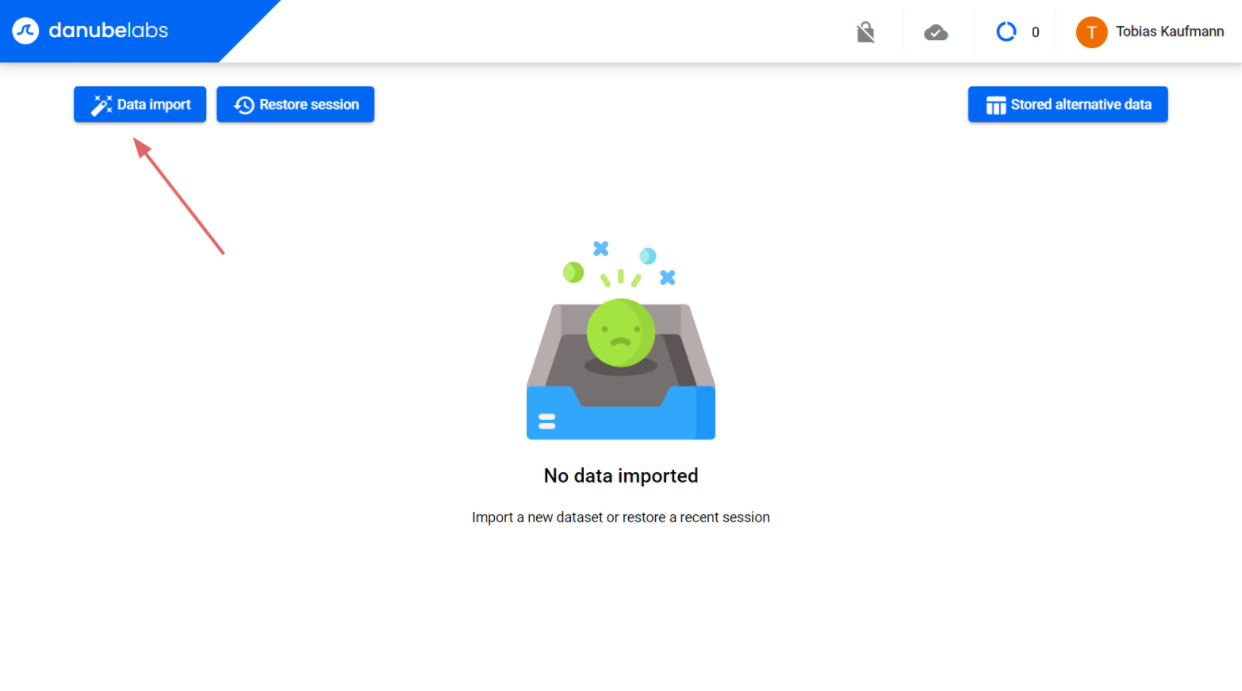 On the import page, you can either download a data
template or upload an existing data set (.csv, .xlsx or
.xls). You can then choose to import your data with a
predefined template or select the respective data
columns manually.
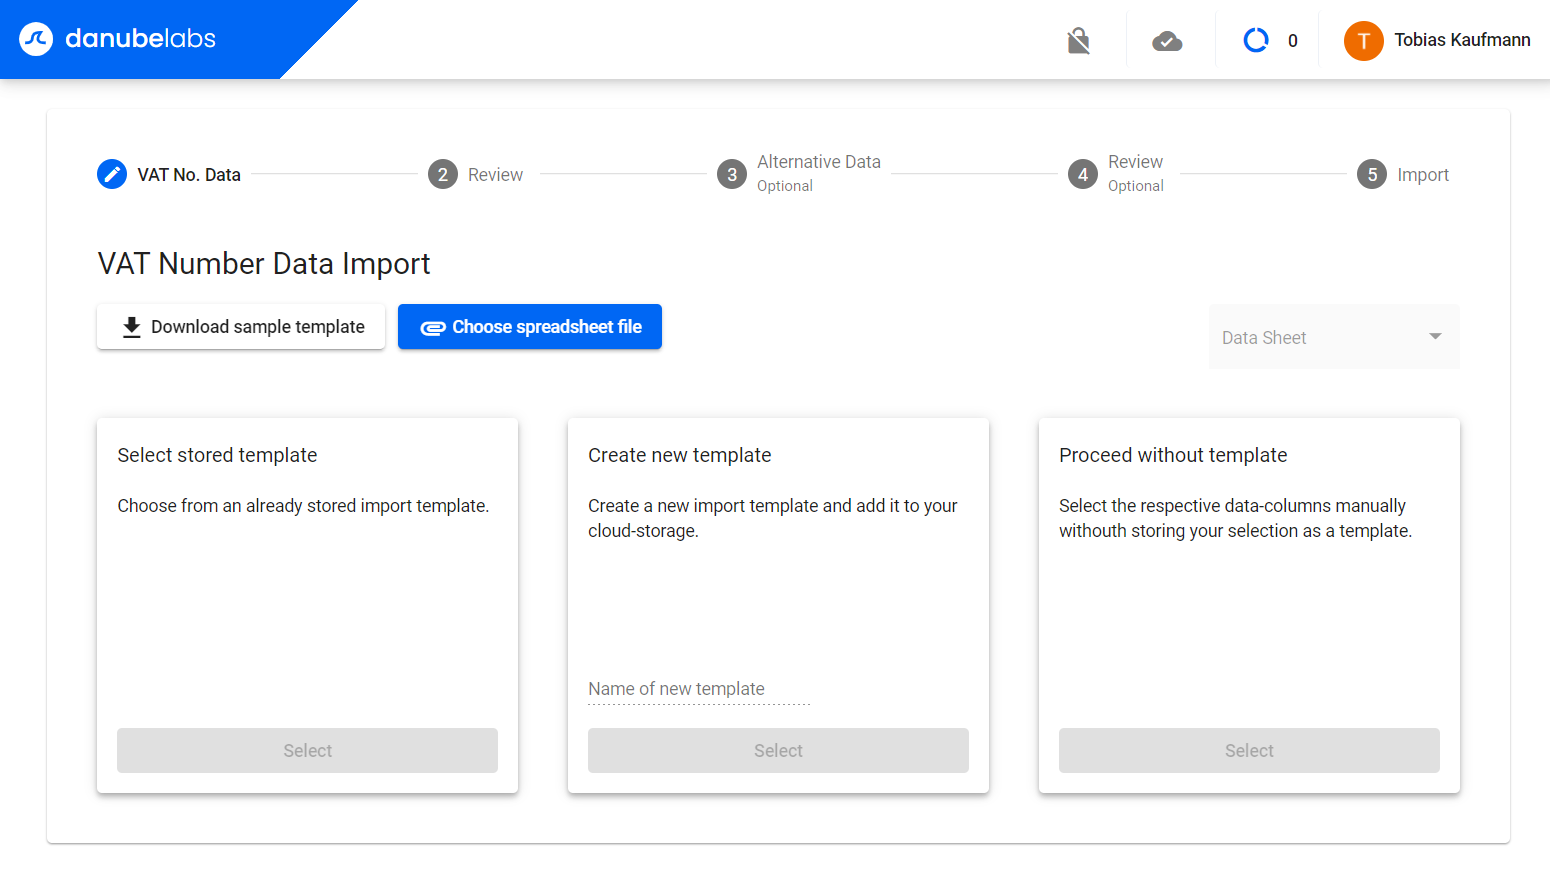
On the import page, you can either download a data
template or upload an existing data set (.csv, .xlsx or
.xls). You can then choose to import your data with a
predefined template or select the respective data
columns manually.The import process allows you to import VAT number data aswell as alternative data (optional). When the import process is finished, you will be redirected back to the main page.
Validating VAT numbers
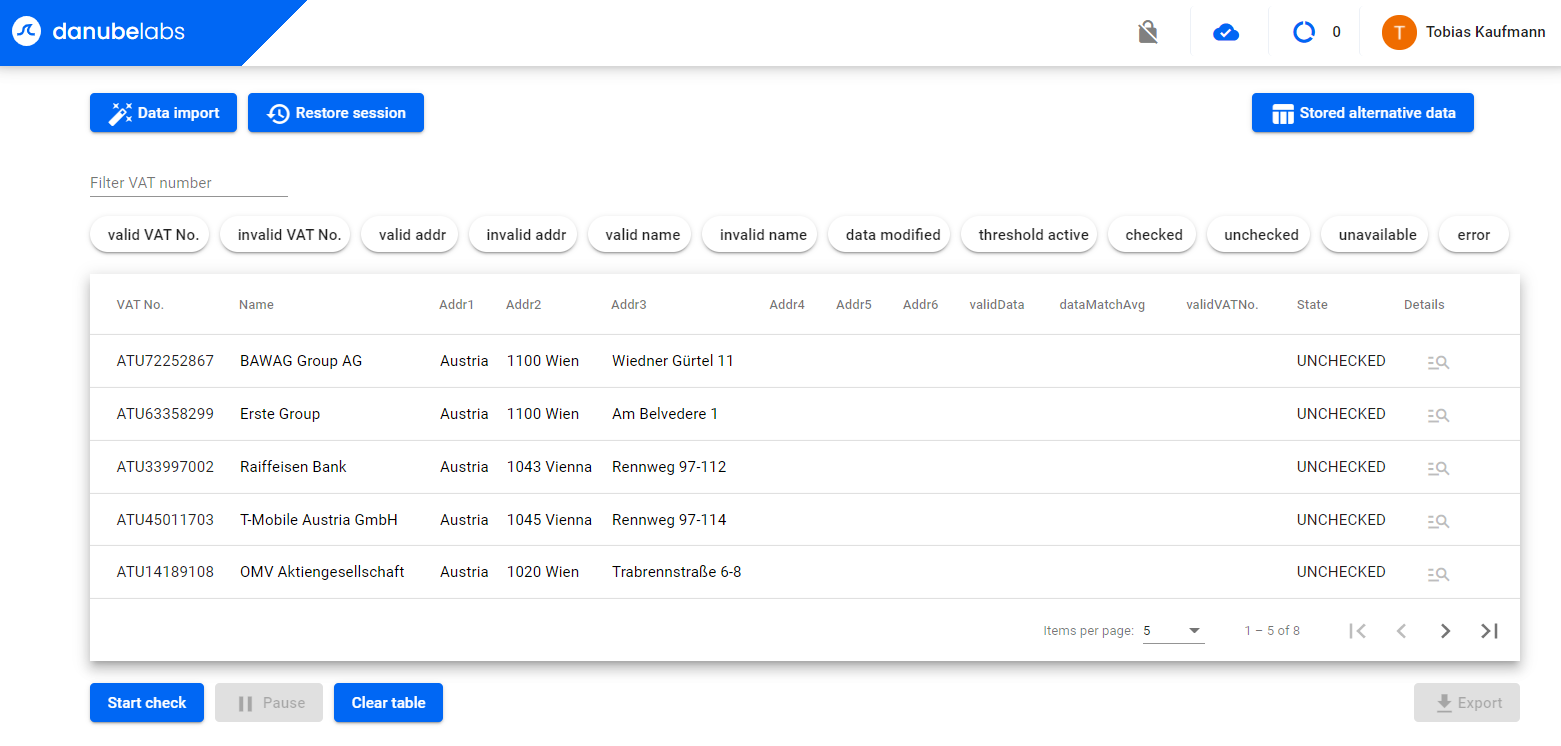
Your data is now imported. If session cloud-storage is enabled, your session can now be restored at any point via the "Restore session" button. To start the validation, press the "Start check" button. When finished, a report with a summary about the check will be displayed.Rows that have the status UNCHECKED, UNAVAILABLE or ERROR can be rechecked with the button "Check unfinished".
Reviewing data rows
After the check is finished, each data row can be reviewed manually by clicking on the lens button on the right side of the table. If the address or name data is marked as invalid, although you want it to be valid, you have two options:Add as alternative data
Adding the response data as alternative data marks the address and name data as valid and stores the response data as alternative data. This means that for future checks, this data row will be flagged as valid.Accept response data
Accepting the response data will flag the address and name data as valid aswell. The difference to adding it as alternative data is that the import data will be overwritten with the response data. This means that on export, you will get the exact data that has been returned by the service API. The accepted response data will not be stored for future use as it is expected that this data will already be in use for the next import.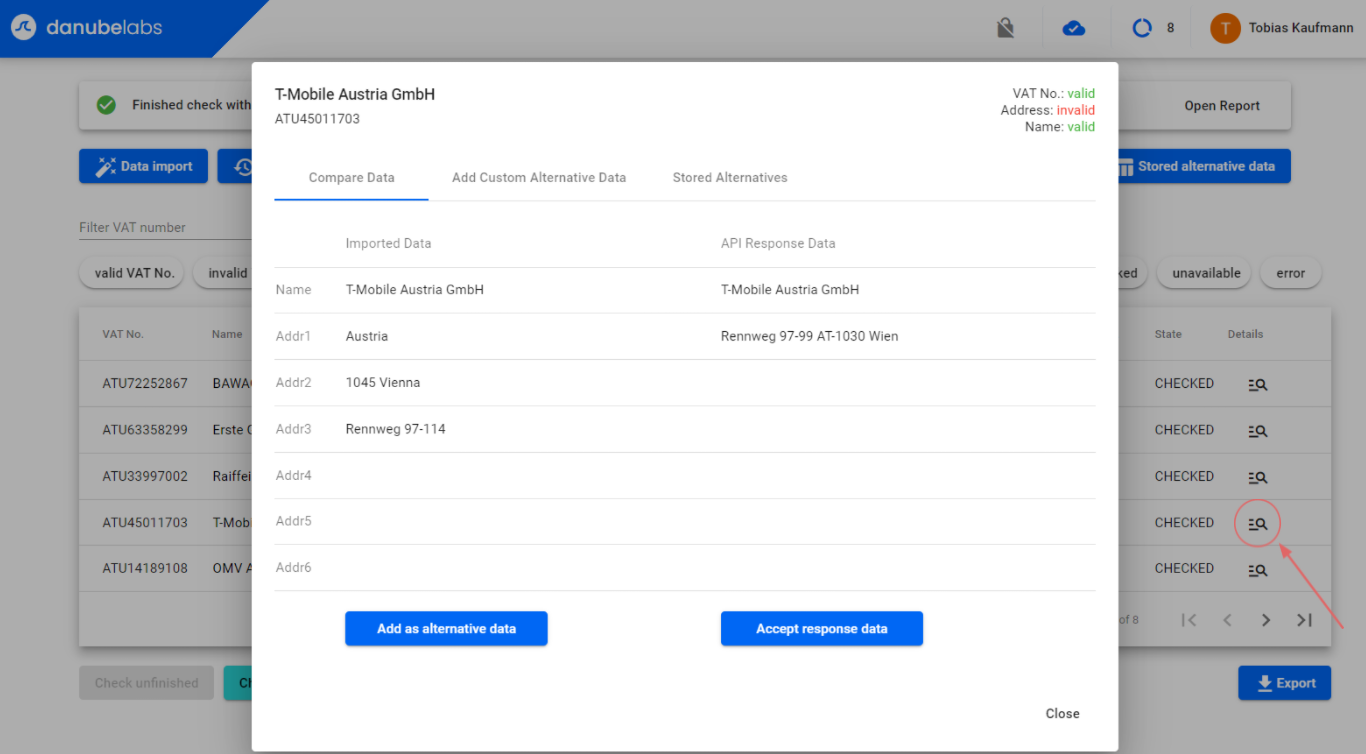
Export
You can export your data in .xlsx format when the current validation process is either finished or paused. For the export, you have several options, although the most important ones are the first two checkboxes:Export all columns in imported format (using original names)
The export sheet will include all imported columns with their original header names.Export only displayed columns (using standardized names)
The export sheet will only include the essential columns (VAT Number, Name, Addr1, Addr2, Addr3, Addr4, Addr5, Addr6).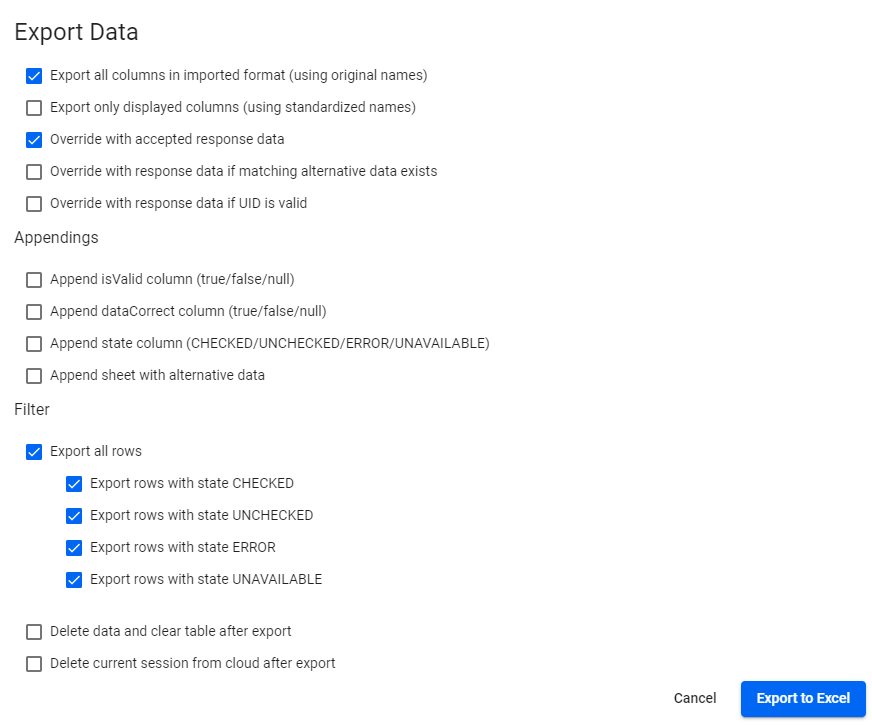
Client side encryption
Client side encryption can be enabled on the "Settings" page. When client side encryption is enabled, your data will be encrypted and can only be accessed with the correct key. If no key is set yet, a prompt for you to set a new key will appear. You can also set a new key on the "Settings" page, although your old data will be lost afterwards.It is also possible to use the software with and without client side encryption in parallel as the data for each mode will be stored in a different locations. If you lose your key, encrypted data cannot be restored!
Navigation bar
The navigation bar holds three different icons.
Client side encryption
The first icon indicates if client side encryption is enabled (blue if active).Session cloud-storage
The second icon indicates if a cloud-storage session is currently active (blue if active). Every action you make with the data (checking, editing etc.) will automatically be backed up to the cloud and can be restored at any point.You can click on it to display the name of the current cloud-storage session.
